
- Matt Leonetti
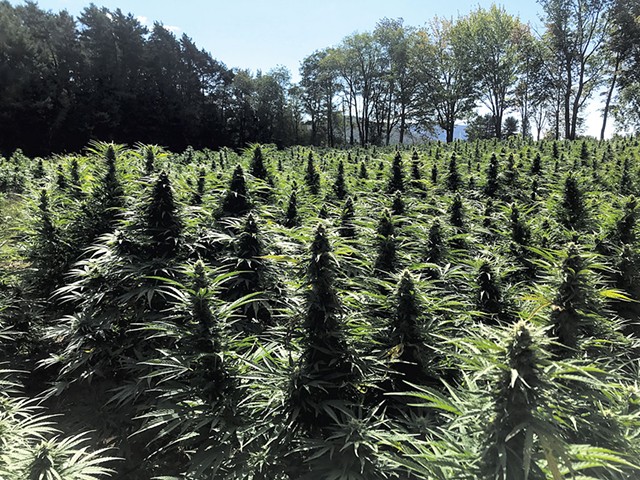
- A field of hemp plants
After three decades as a cultivator and a horticulturist with a degree in plant and soil science, I've learned a lot about cannabis — sometimes the hard way. About 22 years ago, I was swept up in the war on drugs and earned a felony conviction for an Arizona pot bust. But I've always landed on one basic truth: I love this plant! I love growing it, I love consuming it, and I love making things with it.
Most of all, I love sharing it — especially with folks who have no previous experience. I love watching fear and judgment turn to appreciation and gratitude for the numerous gifts this versatile, useful, healing plant has to offer.
Before we dive in, it's worth asking why you want to grow it and what physical and emotional effects you're trying to achieve. Do you want a light, heady buzz that helps you breeze through the dishes before you go on a walk? Do you want profound spiritual insight or sensual fun? Are you trying to get a good night's sleep or deal with an acute medical condition?
Every strain (also called "cultivar" or "chemovar") of cannabis contains hundreds of chemical compounds called cannabinoids. Tetrahydrocannabinol (THC) and cannabidiol (CBD) are the most well-known, but all cannabinoids have a wide range of effects on the mind, body and spirit. In fact, cannabis strains are differentiated specifically by their combination of cannabinoids — but they all belong to the same scientific plant family. For example, hemp is legally defined as cannabis that contains less than 0.3 percent THC.
Cannabis strains also have a wide range of tastes and smells, which come from chemical compounds called terpenes. Terpenes can make cannabis taste or smell like blueberry muffins, lavender, lemon, pine or freshly cut grass. Just like in aromatherapy, terpenes contribute to your plant's therapeutic effects.
Getting Started
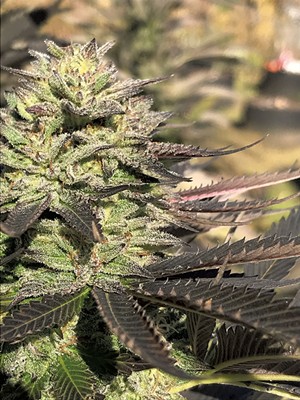
- Matt Leonetti
- Cannabis plant
If you're familiar with growing tomatoes, you'll understand that cannabis plants need water, lots of light, supplemental nutrition and the right-size container.
Cannabis is a gifted bioremediator, which means she'll suck up whatever's in your water, soil and fertilizer. That makes it important to test your water and soil to ensure that you don't have any heavy metals, pesticides or other contaminants. What goes into the plant goes into you, so keep it clean!
By the way, I call the plant "she" because, unless you're breeding, you only want females. If male plants are present, they'll create pollen and fertilize the female plants, reducing female flowers' yield and potency. Be responsible and don't cultivate male plants that can negatively impact other nearby growers.
Much like with baby chicks, sexing the plants can be tricky, but you'll know for sure when they start to flower. To be blunt: Boys have balls.
Germination
Once you have your seeds in hand, the easiest way to get them to germinate is to place them between the halves of a folded, unbleached paper towel. Get the towel wet, and then sandwich it between two plates to keep it from drying out. Seriously, do not let the towel dry out, otherwise sadness will happen!
Put the plates on a heat mat or in a sunny window. Warmer temps encourage faster germination, which can take 24 to 72 hours, depending on your specific setup and the age of your seeds.
Once you have a small root protruding from the seed, plant it root down in your pot of choice, no more than an inch deep, and water thoroughly. Once the seedling has penetrated the soil surface, you'll want to love that baby up with strong sun — or a grow light — to give it a great start. Don't leave it outside overnight until the last frost. In Vermont, that can be mid-May or even early June.
To grow a plant in a single container from start to finish, I'd suggest nothing smaller than a 20-gallon pot. Like Mama used to say, "The bigger the roots, the bigger the fruits!" Personally, I prefer to start them in smaller pots and periodically pot up to larger sizes, which can make nutrient management easier.
Growing Medium
If you're growing in containers, I suggest using Vermont Compost Company's Fort Vee potting mix. The local company does an amazing job of providing a fortified, compost-based mix that is packed with nutrition and microbial life.
If you're growing outside, add compost for nutrients, add lime if your soil is too acidic, and add mycorrhizal fungi and microbial inputs to boost soil life. Come July, when the plants are well watered and cranking, it'll be a good time to give the ladies some supplemental nutrition. Humic acids, kelp meal or fish meal will help keep them healthy and bodacious.
Avoid plastic bottles by using Down to Earth dry soil amendments or White River Growpro's locally made mineral and grow mix. You can also use bloom-supporting mixes just prior to and during the flowering stage. These products are super simple to use: Just scratch in the recommended amounts on the top layer of the soil, and water!
Problem Management
While the ladies are growing, you'll need to monitor them for pests and diseases. Prevention is key here.
Check your plants daily — including the leaf surfaces and undersides, stems, and even surrounding vegetation for harmful insects, such as aphids, spider mites and thrips. Also keep an eye peeled for diseases, such as powdery mildew (roundish white powdery spots) on the leaves and gray mold on the flowers.
I do not recommend using any harsh chemicals — ever. Fortunately, products such as Lost Coast Plant Therapy and those of the Amazing Doctor Zymes offer nontoxic, essential oil-based options for dealing with pests and disease.
Harvest
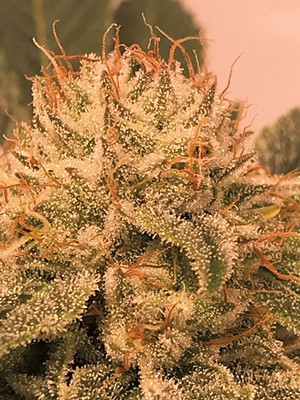
- Matt Leonetti
- Cannabis plant
In late September and early October, harvest is almost upon us! This is a great time to remove many (but not all) of the hand-size fan leaves for increased sun and air penetration into the canopy. This gives the lower, smaller buds a chance to fatten and ripen. You want to be able to look into the center of the plant and see stems, not green leaves — but be sure to keep the smaller bud-site leaves intact.
Determining exactly when to cut down your plants depends on a number of variables. Every cultivar responds differently to the waning length of daylight and will finish at a different time. The most accurate way to determine your plant's ripeness is by using a jeweler's loupe (a sort of magnifying glass) to check the trichomes — tiny mushroom-like glands covering the surface of your buds.
When trichomes are clear, they are not ready, but as they become milky, they're getting close. This is when personal preference comes in. Some folks like a bit of amber in their trichomes, which gives more of a sedating effect. Some prefer a milky color, which gives a more uplifting experience; both of these qualities are also cultivar dependent.
Weather conditions will play into harvest timing, as well, especially if there is a blast of cooler, rainy days, which can lead to fungal and mold issues. Wet weather can force some growers to simply make the call and cut down the plant before any issues develop.
Cannabis plants can also be damaged by hard frosts. Depending on the size of your grow, you can put a sheet or tarp over the plants to insulate them. Some people even use small heaters if temps drop too low. It's worth getting crafty to protect your months of effort.
Trimming and Drying
You've grown your plant, checked the trichomes and decided she's ready to harvest. Now you need to cut the stalks, trim the leaves and let everything dry. Here are a few tips.
Trimming: Strip the stalks of their remaining big fan leaves and gently remove the smaller sugar leaves on the buds themselves. Small scissors can work, but trimming tools such as Pocket Snips from Gardener's Supply will make your life much easier, and your hand will thank you.
Hanging: Dry cannabis with the stalks hanging upside down. You can use anything from clothesline strung across the room to snow fencing hanging vertically. Space the stalks far enough apart to allow for good air flow.
Light management: The drying space should be dark. Cannabinoids degrade in sunlight, so protect the potency of your harvest by covering the windows and doors.
Air flow: Use a fan to create a slight breeze in the room that gently sways the branches, but be sure it doesn't blow directly on the drying material. Ideal conditions are roughly 65 to 68 degrees Fahrenheit with 60 percent humidity. Most folks can't maintain this kind of atmospheric consistency, but aim for these ranges and you'll get a nice, slow dry. Slow and low is the rule of thumb.
Once the plants are dry, it's time for the final trim with the help of a pair of pruning snips, a comfy chair and some good music. The goal is to remove as much leaf material as possible while minimizing damage to the glandular trichomes. Also remove as much stem as possible, but your personal preference will dictate the final look — or "bag appeal," as it's known in the biz.
Curing
With trimming and drying complete, it's time to pull the buds off the stalks and seal them in glass jars or five-gallon food-grade buckets for the next few weeks (or months, depending on your level of patience).
You'll need to open or "burp" your jars daily, which will allow certain compounds such as chlorophyll to break down and give you a more refined terpene profile for better taste and smell. Of course, you can sample your buds before you cure them, but curing will help the flowers explode with smoother, more intense flavor.
Information and techniques abound for cultivating this amazing plant, but these basics will get you started. I've found that most people have a very personal relationship with cannabis, and everyone has their favorite tips and tricks.
So, have fun with it, enjoy the process, celebrate the plant and remember: The best weed is always the stuff you grew yourself!
Matt Leonetti is a farm compliance inspector for Clean Green, the largest nationally recognized third-party certifier for the cannabis industry, promoting responsible, organic and sustainable agriculture. He is also cofounder and farm manager for NurseGrown Organics.


Comments
Comments are closed.
From 2014-2020, Seven Days allowed readers to comment on all stories posted on our website. While we've appreciated the suggestions and insights, right now Seven Days is prioritizing our core mission — producing high-quality, responsible local journalism — over moderating online debates between readers.
To criticize, correct or praise our reporting, please send us a letter to the editor or send us a tip. We’ll check it out and report the results.
Online comments may return when we have better tech tools for managing them. Thanks for reading.