
- Sadie Williams
I live in an apartment with an incredibly shady so-called backyard: a 10-by-15-foot expanse of dirty concrete tucked behind my driveway. I've always wanted a big garden, but, unless a demolition crew knocks down the buildings blocking my sun, rips up the concrete and lays down good gardening soil, it's not going to happen. While a girl can pray, this season I settled on a more practical solution.
- Matthew Thorsen
- Sabrinajoy Milbury
Container gardens can be tailored to any outdoor — or indoor — environment. Got all shade? There's a plant for that. Full sun? Lucky you; grow some tomatoes. With pots in every size, shape and color, and myriad varieties of plants to choose from, the combinations are endless.
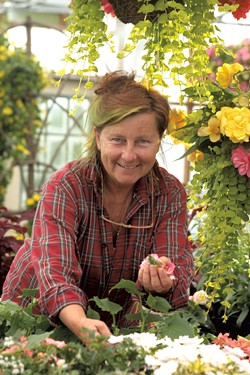
Before getting started on my own potted arrangements, I headed over to Just Dancing Gardens & Greenhouse in Williston, where owner Sabrinajoy Milbury gave me a lesson on how not to screw it up.
"Before you start, you need to know where you want the container to go and what the light conditions are," Milbury began. If your patio gets six or more hours of direct sun, go for plants labeled "full sun." Four to six hours translate to "part sun," and three or fewer hours call for shade plants.
"You want to make sure that you have the right plant for your light conditions," Milbury said. "If you have a beautiful container garden full of plants that want full sun, and you put it somewhere [with] less than three hours, it's just not going to be happy."
Next, we talked soil. Container gardens call for lighter soil than traditional gardens, and you may need to make adjustments depending on what you're growing. If you're growing flowers, a non-organic potting soil works just fine. Milbury recommends Pro-Mix, which she has used for 18 years. For vegetables, fruits and herbs, however, she switches to Vermont Compost Company's Fort Vee organic potting soil. "If we're growing vegetables, we're going to eat it," she pointed out. "I want to use an organic soil."
Regardless of whether you're growing cucumbers or Gerbera daisies, you'll need to fertilize. "For anything that's not edible, I use a time-release fertilizer mixed into the soil," Milbury said. For vegetables, she uses Pro-Gro from North Country Organics, a liquid fertilizer that is applied weekly.
As for selecting a pot, the only requirement is that it have a hole in the bottom. And pot size matters: Bigger is definitely better. "The bigger the pot, the easier it is to keep it watered," Milbury explained. "Because it's got more soil, it'll hold more moisture."
She cautioned against using saucers under outdoor pots. "Saucers are great inside, because they catch water if it's dripping, but outside the roots are sitting in it, and you don't want that, because they can rot." Not to mention that standing water is a breeding ground for mosquitos.
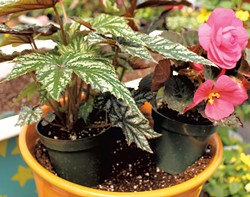
We picked out a medium-size, bright-orange pot to light up my gloomy little scrap of concrete. Now all that remained was to pick out plants. There's no rule for how many to use. Some people follow the "thriller, filler, spiller" model: one tall statement plant in back; fuller, slightly smaller varieties in the middle; and trailing plants to spill over the sides. That formula works, but Milbury encourages gardeners to go for what they love.
I settled on a combination of spiky-leafed angel wing begonia, two funky fuchsias, a red-stemmed lady fern, a chartreuse heuchera and sprawling, silvery pilea.
For about $60, my new container garden helped light up an otherwise boring backyard. It's a good thing I haven't called in the demolition crew: I'm going to need that concrete slab to support more container gardens this summer.
Materials
- Large pot with a hole in the bottom
- Potting soil
- Large plastic tub
- Fertilizer (time-release or liquid)
- Flat strip of broken pottery, large mulch chip or similar object
- Soil Moist
- Plants
- Watering can
Directions
- Sadie Williams
- Preparing soil: Fill your pot(s) with soil to one inch below the brim, then empty into the large plastic tub. Add the recommended amount of time-release fertilizer (for nonedibles) and mix thoroughly. Soak the top few inches with water. Let this sit for a few minutes, then work through with your hands so the soil becomes damp throughout. It doesn’t need to be soaked, but it shouldn’t be bone dry.
- Sadie Williams
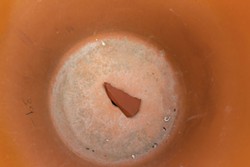
- Filling the pot: Lay the small piece of broken pottery or mulch across the hole at the bottom of your pot. It shouldn’t completely cover it, but should keep the soil from falling out while allowing water to drain. Fill the pot one-third of the way with your dampened soil. Add a teaspoon of Soil Moist, mix thoroughly, then fill the pot to one inch below the brim with the remaining soil.
- Sadie Williams
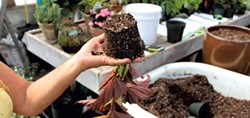
- Potting your plants: Try a few different arrangements before you start planting. Once you’ve settled on a design, grip the stem of your largest plant between your index and middle finger, flip over the plastic container and gently wiggle it loose. Scoop out a fist-size hole in your soil, nestle the plant into it, and fill in with the soil you scooped away, pressing down around the plant with your fingers. Repeat for each plant.
- Sadie Williams
- Water: All that’s left is to give your pot a good soak. When water runs out the bottom, you’ll know you’ve reached every bit of soil and given your newly potted plants incentive to grow deep roots. That will keep them nourished and strong, even if you forget about them for a few days.
- Sadie Williams
- Continued care: If you didn’t use a time-release fertilizer, water your container garden with a liquid fertilizer once a week. If you planted vegetables, make sure it’s organic.
Note: If you plan on growing vegetables, fruits or herbs, amend the first step by omitting the non-organic time-release fertilizer and replacing it with one part organic compost to three parts potting soil.


Comments
Comments are closed.
From 2014-2020, Seven Days allowed readers to comment on all stories posted on our website. While we've appreciated the suggestions and insights, right now Seven Days is prioritizing our core mission — producing high-quality, responsible local journalism — over moderating online debates between readers.
To criticize, correct or praise our reporting, please send us a letter to the editor or send us a tip. We’ll check it out and report the results.
Online comments may return when we have better tech tools for managing them. Thanks for reading.